Computing on the swarm2 cluster
This document outlines some basics of getting started with the swarm2 cluster.
Getting started with SLURM
In what follows, we’ll discuss submitting jobs to the swarm2 cluster using SLURM and the sbatch command, as well as how to do computation on the cluster using an interactive shell session through the srun command. The examples are intentionally minimal and only a starting point. More details on using SLURM can be found on the UMass swarm2 user documentation and the SLURM sbatch man page.
sbatch
We give an example here on how to submit a job consisting of a python script. The only files needed are called test.py and run_python.slurm, which you can download and store in a directory on the cluster. Running the following code from your shell on the cluster will download the files and store them in a directory called test
mkdir -p test
            cd test
            wget https://www.mtholyoke.edu/~tchumley/misc/swarm2/test.py
            wget https://www.mtholyoke.edu/~tchumley/misc/swarm2/run_python.slurm
We now discuss the contents of each file and then discuss how to use them.
Job code
The following code, which is the contents of test.py, is a simple python script for demonstration purposes. It will print out the name of the file and any arguments given when run through the python interpreter.
import sys
            print ("the script has the name %s" % (sys.argv[0]))
            if len(sys.argv) > 1:
                print ("the script has arguments %s" % (sys.argv[1:]))
You can try running the following on the cluster, to see some typical output.
Job submission code
The following code is the contents of run_python.slurm.
#!/bin/bash
            #SBATCH --nodes=1
            #SBATCH --time=1:30:00
            #SBATCH --out=python_job-%j.log

            # load python interpreter
            module load python/3.7.3

            # run the python script, given as command line argument
            python $1
The code contains three parts:
Set up of some SLURM options:
#SBATCH --nodes=1asks for one node on the cluster#SBATCH --time=1:30:00asks to reserve the node for 1.5 hours#SBATCH --out=python_job-%j.logasks to print any outputs of the job to a log file with the specified name format. The%jpart of the file name will give the job number assigned by the scheduler.
Add necessary modules to your environment. Here we just add the module for python, version 3.7.3.
Run the desired commands for the job. Here
$1corresponds to the first argument that will be fed intorun_python.slurmwhen we submit our job.
Submitting the job
We are now ready to submit some jobs. Run the following commands to submit a couple jobs. Recall that you can see the results of the jobs in two files of the form python_job-%j.log.
srun
For simple one-liner jobs, it’s possible to use the srun command instead of going through the trouble of making a slurm file and using sbatch. Running the following will submit a job to a node on the cluster and display the results directly to your shell instead of writing a log file.
It’s also possible to use options with srun, as in the following.
Note that srun can be also used to request an interactive shell on a node so that you can run commands manually one at a time.
It will appear that nothing has changed, but your session will actually be running on one of the compute nodes. Try typing hostname to see that you’re actually logged into one of the compute nodes. When you’re done, you can type exit to return to the head node.
Some remarks on parallel computing
There are some small differences in the options needed when running jobs that depend on the parallel computing paradigm used. The two examples below show the options that should be set for running a (shared memory) multithreaded job and for running a (non-shared-memory) multiprocess job. The options will be, respectively, cpus-per-task and ntasks-per-node.
Multithreading
When running a job that consists of a single process (referred to as a task in the language of SLURM) that can spawn multiple threads, the SLURM cpus-per-task option should be set in order to request the use of multiple cores on the compute node.
The example code below shows a script that generates some matrices and performs matrix multiplication. Python’s numpy library takes advantage of multithreading by default and this is used when doing the multiplication. The code is contained in a file called multithreading_test.py.
import numpy as np
            import time

            start_time = time.time()

            a = np.random.randn(5000, 50000)
            b = np.random.randn(50000, 5000)
            ran_time = time.time() - start_time
            print("time to complete random matrix generation was %s seconds" % ran_time)

            np.dot(a, b) # this line is multithreaded
            print("time to complete dot was %s seconds" % (time.time() - start_time - ran_time))
Now try submitting the following jobs and notice the time savings incurred by requesting more cores through the cpus-per-task option. Note that the upper limit for the cpus-per-task option is the number of cores on the compute node being used.
sbatch --cpus-per-task=5  run_python.slurm multithreading_test.py
            sbatch --cpus-per-task=10 run_python.slurm multithreading_test.py
            sbatch --cpus-per-task=20 run_python.slurm multithreading_test.py
Multiprocessing
When running a job that consists of a process that can spawn multiple, memory independent processes, the SLURM ntasks-per-node option should be set in order to request the use of multiple cores on the compute node.
The example code below shows a script that performs a Monte Carlo simulation to estimate the value of pi. Each core will independently perform a fraction of the computations to be done by using Python’s multiprocessing library and the Pool and map functionalities. The code is contained in a file called multiprocessing_test.py.
import random
            import time
            import os
            from multiprocessing import Pool


            # count the number of random points
            # that fall in the unit circle
            # out of n points
            def monte_carlo_steps(n):
                count = 0
                for i in range(n):
                    x = random.random()
                    y = random.random()

                    if x*x + y*y <= 1:
                        count=count+1

                return count


            if __name__=='__main__':
                start_time = time.time()
                np = int(os.environ['SLURM_NTASKS_PER_NODE'])
                print("Number of cores allocated by slurm: ", np)

                # Nummber of points to use for the pi estimation
                n = 10000000

                # each worker process gets floor(n/np) number of points to calculate pi from
                part_count = [n // np for i in range(np)]

                #Create the worker pool
                pool = Pool(processes = np)

                # parallel map
                count = pool.map(monte_carlo_steps, part_count)

                print("Esitmated value of pi: ", sum(count)/(n*1.0)*4)
                print("Time to complete estimation was %s seconds" % (time.time() - start_time))
Try submitting the following jobs and notice the time savings incurred by requesting more cores through the ntasks-per-node option. Note that the upper limit for the ntasks-per-node option is the number of cores on the compute node being used.
sbatch --ntasks-per-node=5  run_python.slurm multiprocessing_test.py
            sbatch --ntasks-per-node=10 run_python.slurm multiprocessing_test.py
            sbatch --ntasks-per-node=20 run_python.slurm multiprocessing_test.py
Miscellaneous tips
accessing storage directories
Your account on the cluster includes access to the work1 and scratch1 storage space. This can be important because your home directory is limited to 10GB of space, while work1 has a 2TB quota and scratch1 has no quota at all. Note that work1 is backed up nightly but scratch1 is never backed up. Your space is located in the following directories
/mnt/nfs/work1/mnt/nfs/scratch1
However, it’s possible to link to them from your home directory for easier access by running the following commands. Make sure username is replaced with your actual username.
By the way, if you ever want to know how much space is being used by a given directory, you can run du -sh.
ssh keys
It’s possible to ssh into the cluster without having to type your password in each time. Instead, you can authenticate using an ssh key. Please be aware that the following directions assume that you’re running macOS or Linux on your local computer.
The first line below generates a key, and the second line copies it onto the cluster. After running this, you won’t be prompted for a password when logging in from the computer on which you generated the key. Make sure username is replaced with your actual username.
ssh-keygen -t rsa
            cat ~/.ssh/id_rsa.pub | ssh username@swarm2.cs.umass.edu 'cat >> ~/.ssh/authorized_keys'
sshfs
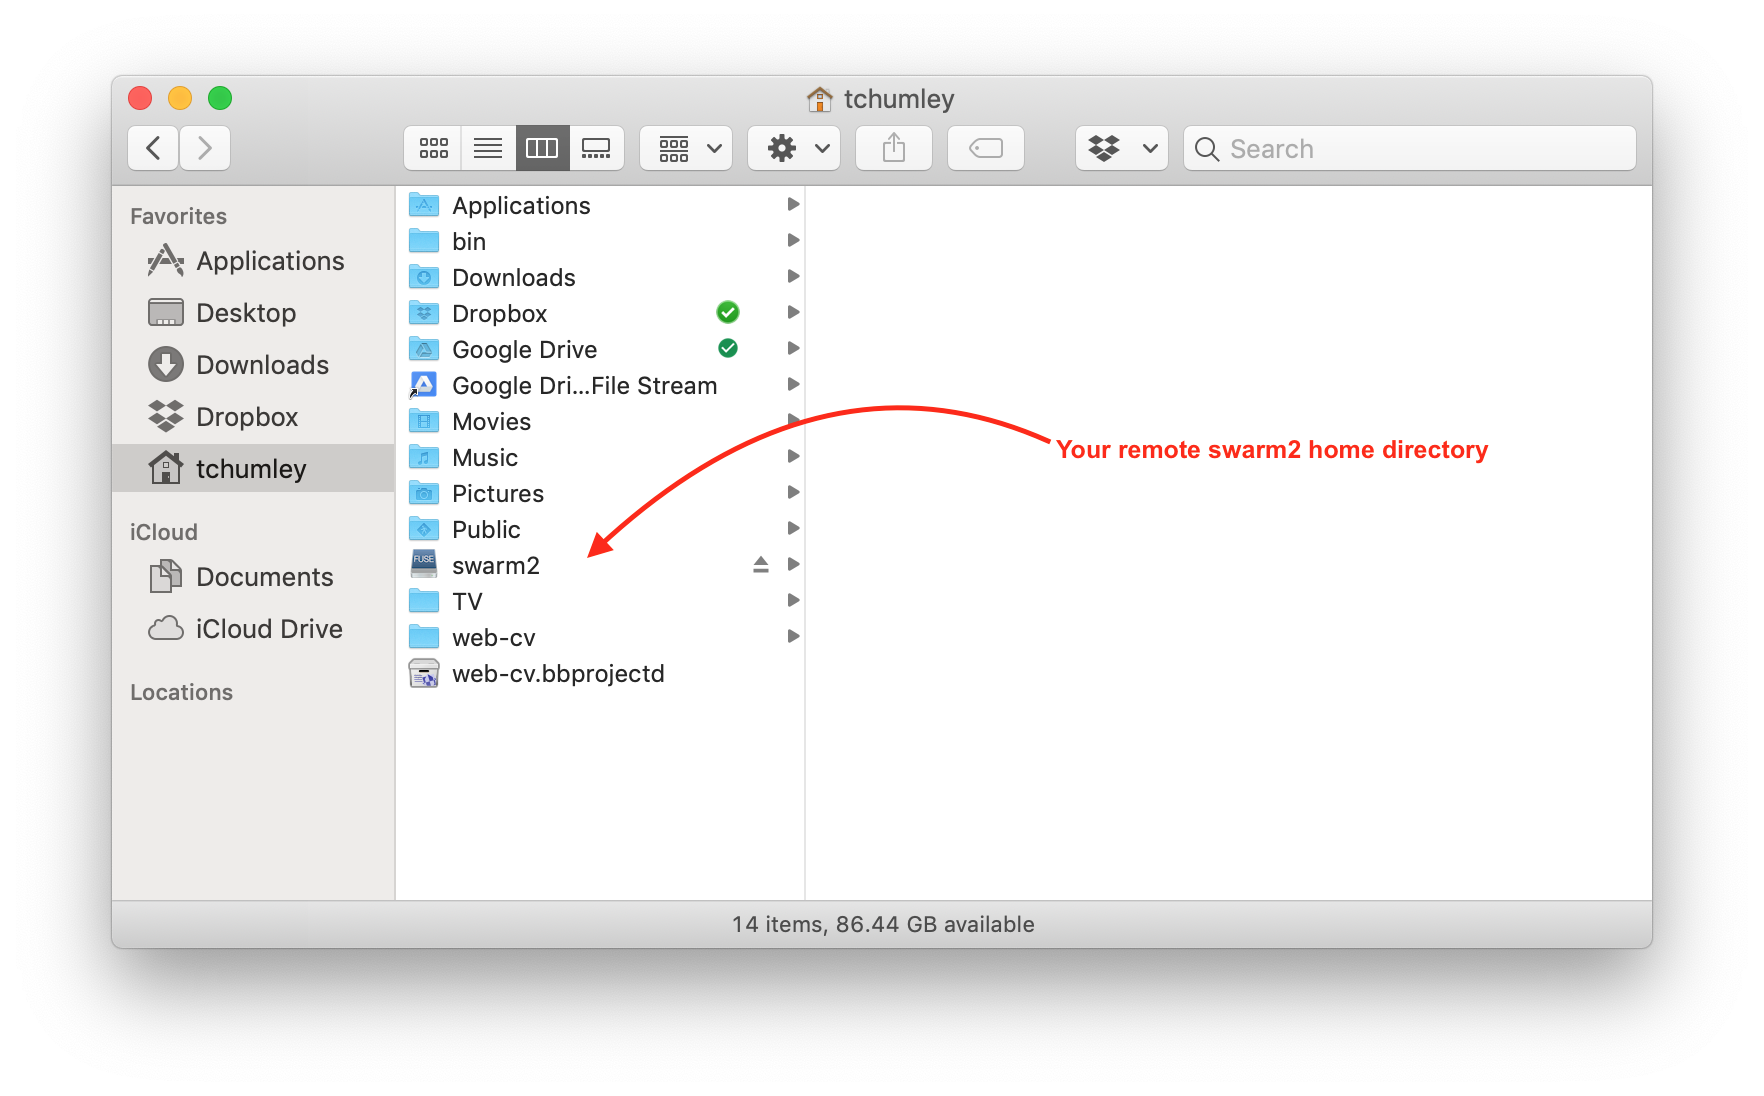
It’s possible to access your files on the cluster using sshfs. The following directions, specific to macOS, will make it look your home directory on the cluster is a mounted drive, like a USB stick for example.
Begin by downloading and installing both
FUSE for macOSandSSHFSfrom the FUSE website.Then, running the following will create, on your local computer’s home directory, a folder called swarm2 onto which your cluster’s home directory will be remotely mounted.
mkdir -p ~/swarm2
            sshfs swarm2.cs.umass.edu: ~/swarm2 -o reconnect -o volname=swarm2 -o IdentityFile=~/.ssh/id_rsa -o follow_symlinks
The cluster directory can be unmounted if necessary by running
- (Optional) The following commands will make a directory on your local home directory called
binand then save the commands above into a file calledmount-swarm2.sh
mkdir -p ~/bin
            cat >> ~/bin/mount-swarm2.sh << EOF
            #!/bin/bash
            mkdir -p ~/swarm2
            sshfs swarm2.cs.umass.edu: ~/swarm2 -o reconnect -o volname=swarm2 -o IdentityFile=~/.ssh/id_rsa -o follow_symlinks
            EOF
            chmod +x ~/mount-swarm2.sh
Now, whenever you want to mount your remote directory, you can run